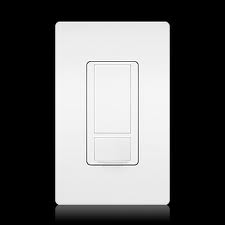
Light switches play an important role in modern homes and buildings. While many people take a light switch for granted, a broken one can quickly become a headache for an individual and his or her family. Fortunately, changing a broken light switch can be easy just by following the right steps.
Before changing a light switch, it’s essential to make sure that the electrical circuit that powers a light is turned off. Most modern homes have a circuit breaker box that is filled with 10 or more switches. Each of these switches provides power to a different part of one’s home. While these circuit breaker switches may be labeled in some homes, they are often left unlabeled. Because of this, it can be difficult to tell which circuit breaker switch will turn off power to an electrical circuit in one’s home.
If in doubt, it’s a good idea to turn off the main circuit breaker for a home while working on an electrical switch. This switch is usually located at the top of a circuit breaker box. In most cases, this switch will be twice the size of other switches in a circuit breaker box. By turning off this switch, one will cut power to all outlets, appliances and other electronic equipment in a home. While this is a good way to reduce the risk of an electric shock, it’s important to make sure that one doesn’t leave the power off in a home for too long; it’s never fun to throw out spoiled food from a refrigerator that’s gone warm.
After turning off the power, it’s time to remove the cover from a light switch. In most cases, one will need to use a flat head screwdriver to remove a light switch cover. After removing the cover, locate the two screws in the top and bottom of the light switch. These screws hold two metal plates that are attached to the light switch itself. In most cases, these screws will require a cross-head screwdriver.
Once these screws are out, pull the light switch directly out of the outlet. However, be careful to not pull it too far out of the wall. This may cause damage to electrical wiring in a home’s walls.
Most electrical wiring will be held in place with a series of flat screws. These screws usually have a very wide head; this gives the electrical wire plenty of surface area to transfer electricity.
While electricians are supposed to follow certain conventions were installing color-coded electrical wires, many professional electricians don’t follow these conventions. Because of this, it can be difficult to tell if a wire has a positive or negative charge.
To avoid problems, it’s a good idea to tag all electrical wires as one disconnects them from an electrical outlet. In most cases, electrical outlets will have a small symbol that indicates if a power connection point is positive or negative. Make sure that all wires are clearly labeled before disconnecting them.
After doing this, it’s time to install the new light switch. When installing the new light switch, make sure to hook up all the electrical wires in the exact same way. In addition, make sure that exposed parts of an electrical wire are not in contact with any other metal surface. If bare electrical wires touch each other, an electrical system may experience a short circuit. This can cause damaged home electronics and an increased risk of a fire.
After all the wires are connected, carefully screw the outlet and outlet cover into place. It’s now safe to turn the central circuit breaker in a home on. After testing the light switch for proper function, one can declare this project a success.
Thanks for visiting Jenny’s Home Improvement!


